Saturday, December 31, 2011

Ringing in the New Year

Happy 2012 Friends!

How was your New Year's?  We had a nice time at supper with some friends and then came home so our daughter could have her friends over.  They want to stay up till all hours at night.  I'll probably toast the midnight hour with my beloved and head to bed :)

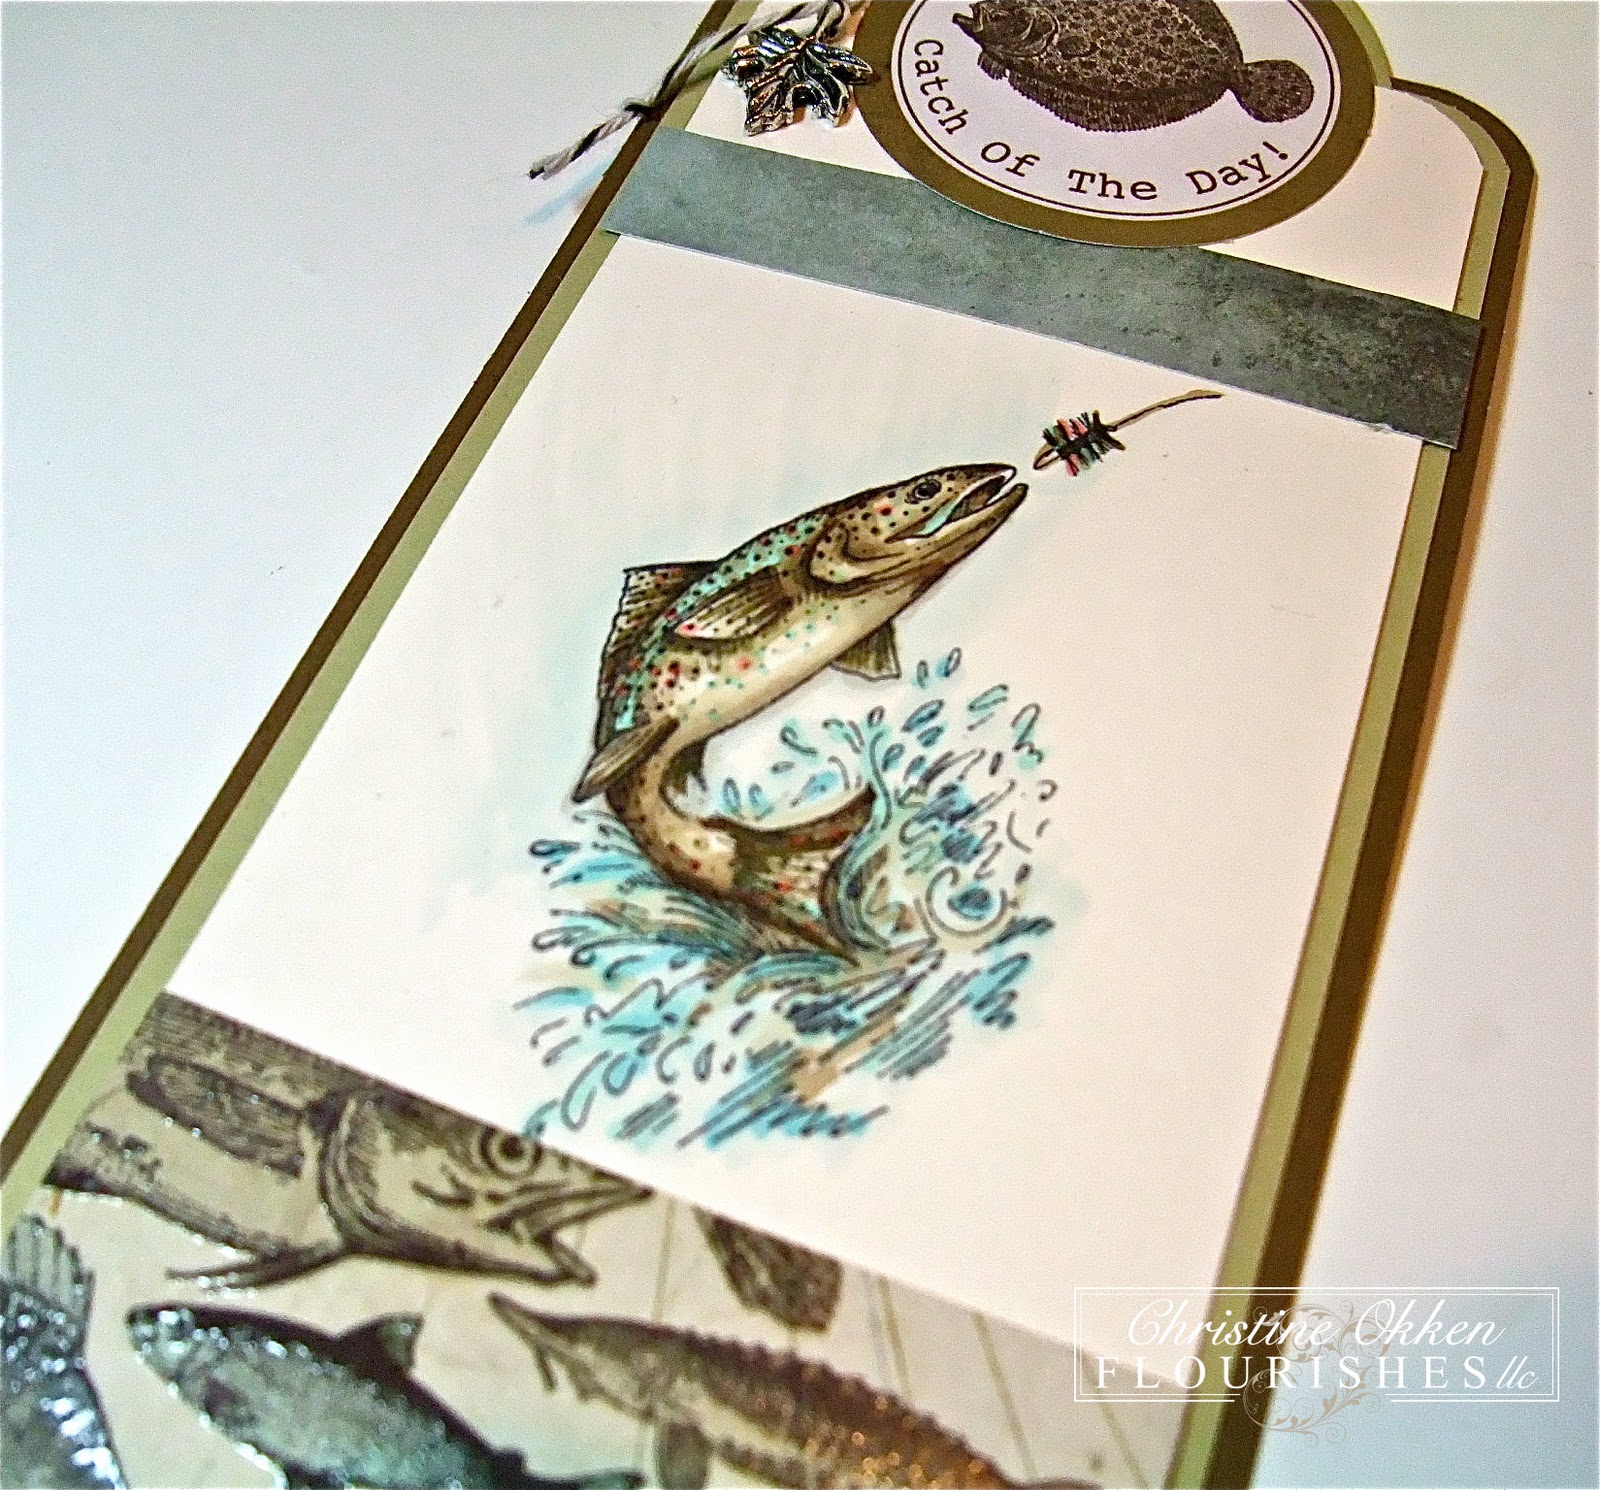
This year I was finally organized enough to collect together some of my favourite creations from this past year in one place to show you.  Problem was....I couldn't always choose just one favourite from each month!  Is that bad?  It feels like you're choosing one kid over the other!  Some months I appeared to be more creative than others too.  I'll show you some today and some tomorrow if that's alright with you :)  At the end of my 12 months I'll have a contest on what's your #1 favourite, and then I'll give away some blog candy.  Sound alright?

January 


February 


 March


April


Friday, December 30, 2011

Celebrate on Your 74


Tonight we celebrated my Dad's 74th Birthday.  It was a really nice time to get together with my immediate side of the family, have a meal together, celebrate his life, and the gift of another year. Just over a year ago my Dad was in the hospital with serious complications from heart disease.  That always puts things in to perspective for me.  He's doing much better now, but we know that every day, every year is a gift - for all of us!

I pulled out a couple of PTI sets to create this more masculine and yet kind of funky birthday card.  I haven't ever had a chance to use these number dies from PTI but boy are they great!  Perfectly personalized :)    

Happy end of 2011 everyone!  We'll be keeping it low key here, hangin' with the kids and our daughter's twin best friends over for the night.  

Thanks for the blessing of knowing you this year!  I look forward to another year of creativity with you in 2012!

Stamps:  PTI - 2011 Birthday Tags, Mat Stack 3 Collection;  Ink:  Memento Tuxedo Black, Memento Potter's Clay, Buckaroo Blue;  Paper:  Kaiser Hunt and Gather, Marina Mist, Flourishes Classic Ivory;  Accessories:  Big Shot, By the Numbers PTI Dies, Buttons, Twine, Glue Dots, Dimensionals, Copic Markers. 

Thursday, December 29, 2011

Tin Tin Tin


**Scroll down a wee bit if you'd like to see Barbara's Retirement celebration card :) **

Welcome to another Flourishes Free for All Friday.  Today the Design Team is going to focus on how to use some really great tins we have in the store.  If you stopped by yesterday you saw the pretty barrettes I created for my nieces for Christmas, and today I'll show you how I packaged them all up to be special for each niece.


Each of the little nieces received two barrettes and two little tins, especially made for each of them;  the tin matching the barrette that was inside.  I have two nieces with "A" names that that's why they're are four A's.  To customize each tin I pulled out some new and fun Basic Grey paper called Indie Bloom  .  It has great vibrant colors in it with fun patterns.  I traced each tin and trimmed out the paper, covering the inside and outside to match, using ScorTape so it would stay secure.


I labelled each tin with Flourishes Country Charm Labels sets, and the Spellbinders Grommet Tags.  Finishing the tins off with some fuzzy chenille ribbon attached with Scor Tape along the bottom, and some pretty gem embellishments.  


Now check out the inside with the barrettes!  See how each barrette fits perfectly inside the tin?    


Join the rest of the DT today for some creative ideas with tins!  Best news?  They're only 75 cents in the store!

Happy Days are Here!

Someone special is happy today has arrived :)  Today Barbara Anders is celebrating her LAST day of work and retirement!  Woo Hoo!  I know she's been counting down the days on her blog for a long time to finally be here.  So today Tammy Hershberger and a bunch of Stampy Girls have gotten together to wish Bar a very happy Retirement Day!


I really, really love this set from Flourishes, it's called Spring is Sprung.  It's one of my fav's from the past year of releases.  And I love the theme of new beginnings in it, perfect for the new beginning of retirement life!

I've used some pretty Copics to give it a fresh dose of springy color and this week's Mojo Sketch for some round fun.   The papers are from MME Sunshine pack.


Now isn't this sentiment perfect for the inside of the card?


Happy Retirement wonderful lady!  And many happy stamping days ahead!  

Here's the rest of the girls playing in the celebration so go and check them out:


Stamps:  Flourishes - Spring is Sprung;  Ink:  Memento Tuxedo Black, SU Pool Party;  Paper: Flourishes Classic Ivory, My Minds Eye - Sunshine DP, Cool Caribbean, Crumb Cake;  Accessories:  Grand Calibur, Spellbinders Grand Scalloped Circles, Spellbinders Grand Circles, Standard Circles Die, Spellbinders Creative Book Pages, Copic Markers (BG0000, BG11, BG70, BV000, YG17, YG61, E43,E44, E47, E81, E87, W2), Crumb Cake Seam Binding, Twine, Assorted Buttons, Glue Dots, Dimensionals. 

Wednesday, December 28, 2011

Cute Custom Flower Barrettes

How is your post Christmas week going?  We had a great Christmas, but unfortunately the stomach flu found our home right after Christmas, meaning we didn't go to the mountains as planned.  Really a bummer :(

I enjoyed the giving this Christmas :)  We have four little nieces under the age of 7.  They are all girly girls, with pretty hair that begs to be "embellished" :)  So this year for Christmas, I made them each special hair barrettes.  It's actually a very easy project, and they turned out SO cute!


I started out with some felt, my Grand Calibur and this great Spellbinders Spiral Blossoms One Die from Flourishes (and the die is on sale right now :) ).  A heavier wool felt is far superior for this project, cuts like buttah!  But, you can also use regular crafting felt too.  You'll just have to run it through your machine more than once and be willing to snip any fuzzyness.  I taped my die to the felt so that when it ran through the machine more than once (this was the crafters felt), it would stay in place and not slip. 


Here are the other supplies I used:  The leaves are made from the Blossom Tags Accents Die (also on sale!).  Then I found some barrettte hardware at the craft store, and my hot glue gun.  


Starting from the outside of the flower and working in, roll up the blossom allowing the petals to become "rose-like".   


With your hot glue gun, add a small blob of glue onto the center of the wide-est part of the petal middle and attach your rolled flower.  Allow to cool. 


Add a line of hot glue to the top of the barrette hardware.  Lay leaves overtop of hot glue.


Add a larger circle of hot glue onto center of leaves and attach rolled felt rose.  When cool snip any threads of glue.  

DONE!  


And seriously aren't they the cutest?  I'm so happy with how they turned out.  They are so simple to make and yet make such a pretty custom hair barrette for pretty little girls!  I even put one on my 15 year old daughter, and it looked so great in her hair too.  

Come back tomorrow for Flourishes Friday and I'll show you how I packaged them.  Too cute :)

Tuesday, December 27, 2011

Looking For Some Stamping Fun?


Here in Canada we've just had Boxing Day....that's where you will find all sorts of deals and shoppers looking for them, much like Black Friday in the US.  At Flourishes the team has been busy at home base trying to go through all of our shelves to prep for our end of year inventory. After walking through the warehouse, it was clear…. FLOURISHES NEEDS A SALE! 
So, if you have Christmas money to spend, we’ve got a great deal you won’t want to miss! From now through Friday, everything in the store is 25% off. Even the goodies on our sale page that have already been reduced for quick sale are 25% off the sale price!

TO TAKE ADVANTAGE OF THE SALE…

Simply use XMAS11 in the coupon code box at the time of checkout.

 Be sure to hit the recalculate button on the page so that your total adjusts to the sale price. Keep in mind, there are no rain checks or back orders. Once some of these items are gone, they will be gone for good! So, shop early for the best selection!

Thursday, December 22, 2011

Cozy Cabin


Hard to believe, tomorrow is Christmas Eve!  In our family we celebrate Christmas with the Christmas Eve Service at Church and then come home to open presents together.  After presents we have a big meal full of yummy appetizers late at night.  On Christmas Day its Church again and a big meal with the family at our place.  Then after Christmas this year we're then heading to the mountains for a few days, which we're really looking forward to.  It's not a cozy little cabin like this, but I feel very cozy in the mountains :)  

This cozy little mountain retreat is brought to you today from Flourishes with the brand new Snow Wonderful Stamp Set and our new Tailor Made Classic Keyhole Die.  I really love when stamps and dies go together.  It's perfectly polished!  I've colored up the scene as a sunrise/sunset, in some very warm Copic Colors to go with this great paper from Kaiser aptly called December 25th.  

Some accenting with the Parisian Accents and Motifs Dies from Spellbinders, and a sentiment with Holiday Tags Dies, all sponged to age them.  


Copics Used:  

+ E31, E23
 
+ W00, W1, W3, YR30, YR24, B0000


Remember the New Release Bundle at a 10 % discount is only available till tonight (Friday)!   Don't miss out on these great sets!

Blessings to each of you this Christmas!  Thanks for being a treasured part of my creative day!

Join the rest of the Design Team to see some other wonderful inspiration with this month's sets. 

Monday, December 19, 2011

A Little Note Card-Victorian Box

Hello again everyone!  Good News!  I think I got my Christmas shopping done today!  Woo Hoo!  I have to unpack everything from it's hiding place now and sort out what is for each person, to see for sure - and compare to my list;  but it was a good day to accomplish things, and that feels great.  By tomorrow I'll have all my Christmas cards out the door too.   How are you doing on getting things done?

Another quick installment of a gift I did for our staff Gift Exchange at the office.  We had to do a homemade-style gift (SO difficult hey?  Wink!)  Many months ago I made another Grand Victorian Box for Splitcoaststampers HERE is a link to the tutorial I had done, and hadn't shown it to you yet, so I made some note cards quickly to go with it and put it together for the Gift Exchange.

Here is the box with the beautiful Zinnias set:  You can click on any of the pictures to see them larger if you like.


And here are the note cards and envelopes that went inside.  Super simple and straightforward on each of them: 


And one more look at the top of the box:


I just love the Zinnias set!  

Sunday, December 18, 2011

Last Minute Gift Projects

Hello there Christmas Shoppers....only 5 shopping days till Christmas....are you done yet?  I'm not.  But I'm getting much closer.  It irks me that I can never get to the shopping BEFORE the last week of Christmas when I really want to be soaking in what Christmas means and preparing for my Emmanuel again.  BUT I will just take my list one thing at a time, and choose an attitude of watching for Him at work.  The opportunity for that kind word for a shop worker, letting someone in line, a smile for someone who needs it.  The "stuff" isn't what Christmas is.  But you need to keep reminding yourself of that don't you?

Good news is, I finished my Christmas cards, letters and photos (about 80!), we finished making 37 single pounds of fudge for our youth staff and the kids' teachers for Christmas.  So those are two huge things off the list.

OK.  You didn't come here for all that.  Last week I told you that I made some things for our middle son's band fundraiser gift baskets.  Here's the last two things I put in the baskets.

The first was another bookmark for the Book Lovers Basket.  This one a little more masculine.


This is for your fishing fan...who might be a reader too :)  Some pairing with the What A Catch set and Kaisers Hunt and Gather paper.  They seem to be made for each other.  


Do you see the raised shine in the paper?  Really awesome.  Copics used:  E81, E43, E47, E44, E87,  W2, BG11, BG53, BG70, R22.  

And a quick pic of the top details, including a silver maple leaf charm I had.  And a paper circle from the Hunt and Gather Paper, there's lots of extra accessories in this pack.  


And then for the Pampered Mom Gift Basket I made a simple trio of cards.  I was looking for something quick and all occasion as well as feminine.  So I pulled out my Kids Play set, some distress ink (Ranger Wild Honey on the images)and went to town with these Kaiser Vintage Timeless Papers.  


I tried to go with similar layouts, styles and embellishments for each of these.  


Short and sweet on details today.  If you need more info you can let me know :)

Have a great Monday!